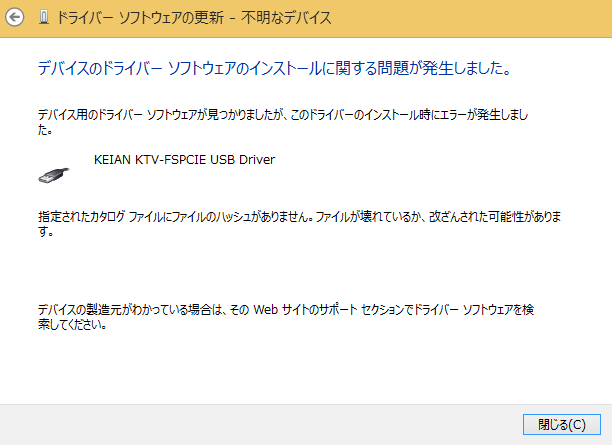
現象
ここではWindows 10 で、ドライバをインストールしようとしたら「指定されたカタログファイルにファイルのハッシュがありません。」というエラーメッセージがでてドライバをインストールできない場合の解決方法を説明します。
解決方法の流れ
流れは、以下のようになります。
①テストモードで入るように設定する
②テストモードでドライバをインストールする
③設定を元に戻す
では、説明していきます。
①テストモードで入れるように設定する
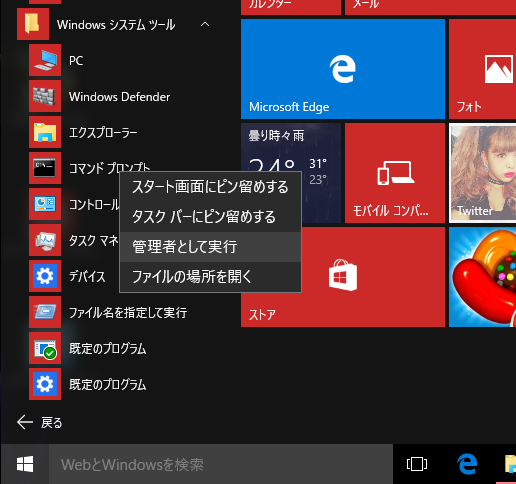
①-1 コマンドプロンプトを管理者として実行
「スタートメニュー」の「すべてのアプリ」からコマンドプロンプト選択し、
右クリックメニューの「管理者として実行」で起動させます。
①-2 bcdedit /set TESTSIGNING ON
bcdedit で テストモードで起動するように設定します。
設定前に現在の設定内容を bcdedit と打って確認します。
bcdedit /set TESTSIGNING ON と打って設定
もう一度 bcdedit と打って設定されていることを確認します。
Microsoft Windows [Version 10.0.10240]
(c) 2015 Microsoft Corporation. All rights reserved.

C:\Windows\system32>bcdedit

Windows ブート マネージャー
--------------------------------
[省略]

Windows ブート ローダー
--------------------------------
identifier              {current}
device                  partition=C:
path                    \Windows\system32\winload.exe
description             Windows 10
locale                  ja-JP
inherit                 {bootloadersettings}
recoverysequence        {xxxxxxxx-xxxx-xxxx-xxxx-xxxxxxxxxxxx}
recoveryenabled         Yes
allowedinmemorysettings 0x15000075
osdevice                partition=C:
systemroot              \Windows
resumeobject            {xxxxxxxx-xxxx-xxxx-xxxx-xxxxxxxxxxxx}
nx                      OptIn
bootmenupolicy          Standard

C:\Windows\system32>bcdedit /set TESTSIGNING ON
この操作を正しく終了しました。

C:\Windows\system32>bcdedit

Windows ブート マネージャー
--------------------------------
[省略]

Windows ブート ローダー
--------------------------------
identifier              {current}
device                  partition=C:
path                    \Windows\system32\winload.exe
description             Windows 10
locale                  ja-JP
inherit                 {bootloadersettings}
recoverysequence        {xxxxxxxx-xxxx-xxxx-xxxx-xxxxxxxxxxxx}
recoveryenabled         Yes
testsigning             Yes
allowedinmemorysettings 0x15000075
osdevice                partition=C:
systemroot              \Windows
resumeobject            {xxxxxxxx-xxxx-xxxx-xxxx-xxxxxxxxxxxx}
nx                      OptIn
bootmenupolicy          Standard

C:\Windows\system32>

これでテストモードで入るための設定は完了。
②テストモードでドライバをインストールする
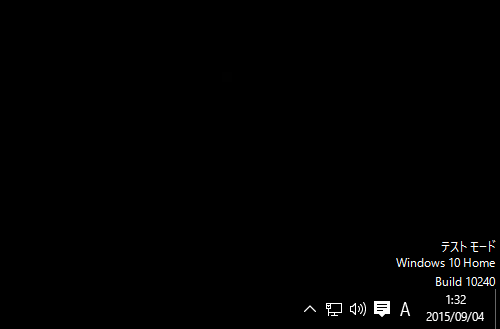
②-1 再起動、テストモードの表示を確認
再起動します。
特に起動時に何かするということはなく、Windows が立ち上がるのを待ちます。
Windows が立ち上がったら、画面右下に「テストモード」と表示されていればOKです。
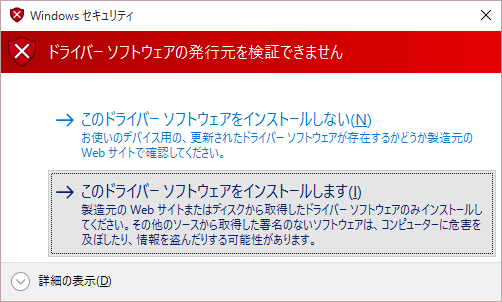
②-2 「ドライバーソフトウェアの発行元を検証できません」と出るけど構わずインストール
通常通りデバイスドライバをインストールします。
「ドライバーソフトウェアの発行元を検証できません」と表示されるが、
「ドライバーソフトウェアをインストールします」を選択してインストールします。
②-3 ドライバーソフトウェアが正常に更新されました。
「ドライバソフトウェアが正常に更新されました。」と表示されインストール完了です。

③設定を元に戻す
③-1 bcdedit /set TESTSIGNING OFF
bcdedit で設定を元に戻します。
①-1 の時と同じようにコマンドプロンプトを管理者として起動して、bcdedit /set TESTSIGNING OFF と打ちます。
そのあと、bcdedit と打って設定を確認します。「testsigning No」となればOKです。
Microsoft Windows [Version 10.0.10240]
(c) 2015 Microsoft Corporation. All rights reserved.

C:\Windows\system32>bcdedit /set TESTSIGNING OFF
この操作を正しく終了しました。

C:\Windows\system32>bcdedit

Windows ブート マネージャー
--------------------------------
[省略]

Windows ブート ローダー
--------------------------------
identifier              {current}
device                  partition=C:
path                    \Windows\system32\winload.exe
description             Windows 10
locale                  ja-JP
inherit                 {bootloadersettings}
recoverysequence        {xxxxxxxx-519c-11e5-88f8-a6d05af7c38d}
recoveryenabled         Yes
testsigning             No
allowedinmemorysettings 0x15000075
osdevice                partition=C:
systemroot              \Windows
resumeobject            {xxxxxxxx-xxxx-xxxx-xxxx-xxxxxxxxxxxx}
nx                      OptIn
bootmenupolicy          Standard

C:\Windows\system32>
③-2 再起動、テストモード表示がないことを確認
再起動して、画面右下に「テストモード」の表示がないことを確認して終わり。

以上